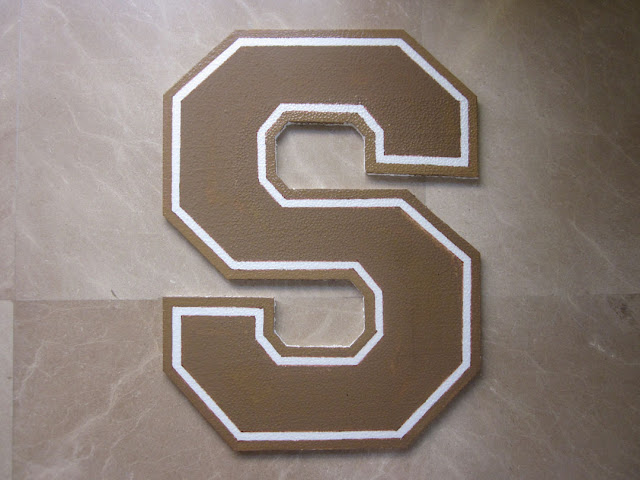
STEP 1: OUTLINE YOUR LETTERS
The boards I bought at National Bookstore were 2ft x 4ft x 1/2" thick for P49 each. The height of each of my letters were 24" so I was able to fit 2 letters per board. I deliberately chose the thinnest board at 1/2" so that it would be easier to cut. I used the Varsity font which is the same font I used on the invites and other printables and just drew it by hand using a pencil.
You can use different fonts depending on your theme or if you want to do much smaller letters, then just print out your desired size and use it as a template. Just cut out the paper letters with scissors, tape them to the styro and trace the outline of the lettering onto the board.
I just used a normal knife and I was able to cut through the styro like butter! The edges were straight and I didn't even make such a huge mess with all the stray particles when you break off a piece of foam.
STEP 3: PAINT THE STYROFOAM
I first used a pentel pen to make two half inch borders along the inside of the letter as a guide when painting.
Now, I had no idea how to color styrofoam at first. I didn't know if you could even paint styro in the first place. Well, I had leftover acrylic paint from the owl tree wall mural I did for Miley's room and luckily it was brown!
I used the bigger brush to paint the inside of the letters. The acrylic paint adhered really well and the color looked great! Since the paint I used was water based, I was able to quickly erase any smudges I made beyond the lines by using a wet cotton bud.
The smaller brush was used to paint the half inch border around the edges of the letters and for the sharp corners.
This is what the rest of the letters (and number) looked like during the party. =)
From my supplier ratings, you'll know that I was able to get a grass wall hedge where I stuck the letters on. But even without the grass backdrop, I'm sure it would still look awesome since it has that 3D effect to it. What's great is that since styrofoam is so light, you can just use masking or double sided tape to stick them on the wall. No drilling required! You can make all kinds of sizes or shapes and use different fonts or colors. You can use them to decorate your child's room, make ornaments and other craft projects. And the best part is it's so inexpensive and easy to do!


Awesome Idea. Very Creative. I am not so good with the lettering. I hope my project turns out as clean looking as yours.
ReplyDeletenot bad! ang galing actually! :) thanks for sharing
ReplyDeleteHi MrsMommyHolic! Please send me details of where did you get the grass backdrop, is it for rent? Thank you! I want to have it for wedding as backdrop to couple's table. Thanks a lot!
ReplyDeleteYes, it's for rent! Check out THE GARDEN WEDDING CO. on Facebook: www.facebook.com/pages/The-Garden-Wedding-Co/161008467258038
Deletehi good morning ...where can i buy a letter tracer for styrofoam
ReplyDeleteI just did mine freehand using a ruler. But maybe you can try in National Bookstore? :)
Delete