Showing posts with label wall art. Show all posts

Saturday, June 3, 2017

Our updated picture frame wall gallery

I first put up these photo frames back in 2012 when we only had two kids. I've been meaning to change and add photos ever since we had Skyler and finally I've gotten around to doing it.

Here was one side of the wall before:


Tuesday, August 4, 2015

DIY Triangle Accent Wall

After I painted my kids' room blue, I knew I wanted to do something with the main wall behind their bed. It previously had an owl mural so the plain blue was just looking well a little... plain. ;p


Saturday, March 14, 2015

Removing mounting tape from your walls

Most of the frames in our house are hung on the walls using double-sided mounting tape.

bought this in National Bookstore for P30

This is mainly because of these reasons:
1. I'm scared and don't know how to use the electric drill
2. Hubby hates drilling holes in our walls so useless to ask him for help (well, he did drill some bathroom stuff for me once after I begged him to!)
3. I have a lot of frames and wanted the option of removing or rearranging them later on without having to deal with holes in the wall

Well, all those frames I've put up the past couple of years have remained untouched, until recently when I updated our family silhouette art. I was nervous since I didn't have a good experience in taking off those adhesive hooks before, which also used the same type of tape. The tape in one hook ripped the paint off my wall when I removed it. :(

Anyway, after all this, I now know that mounting tape is super strong stuff! When they say heavy duty, they mean it! And the thing is, I used quite a lot because I was afraid of the frames falling and breaking later on (none ever did). Now I'm learning the hard way. It was a pain to remove! The frames really wouldn't budge no matter how hard I tugged on them. 


What I finally did was to get a knife and tried to slice carefully through the tape. It was challenging since I didn't want to destroy the walls by peeling off whole chunks of paint which would have been much worse than drilling a hole in the first place. Plus I really needed to put some force for the knife to cut through the adhesive. It did work but there was a lot of stuff left on the walls.


At first I thought I had definitely damaged the wall, but it was all just leftover tape. I ended up peeling what I could little by little (because it does come off naman). It wasn't easy though and my hands and fingers were so sore after a while...


I asked hubby for help and what he did was put baby oil on the remaining adhesive to soften it up. Then he used an old toothbrush to scrape off what was left and finally a washcloth to scrub and clean everything up. And it worked! It took a bit of effort but the walls were damage free, aside from a bit of discoloration from where the frames used to be.

yey good as new! :)

So the question is, did I use mounting tape again considering how hard it was to remove? 

YES, I DID. ;p

But this time, I used less and only on the sides, not anymore in the middle (since that was the hardest part to remove with the knife). The main thing for me was that mounting tape does its job of hanging the frames and even though can be a pain to remove, at least no holes in my walls!

Thursday, March 12, 2015

Updated Family Silhouette Art

I made a DIY silhouette art of our family back in 2012 when it was just me, hubby, Miley and Sabe.

read more about this DIY project HERE

I've been meaning to update it last year ever since Skyler was born, but never got around to doing it until a few days ago. I was thinking whether to just keep our old silhouettes and just add another one for Sky, but decided to just redo everyone's artwork. And it was nice to see the difference after a couple of years. :)

LEFT: Miley in 2012, RIGHT: Miley in 2015
LEFT: Sabre in 2012, RIGHT: Sabre in 2015
Skyler's silhouette at 1 year old

I bought my frames in SM also a few years ago and if I remember correctly, they only had those 4 colorful ones (aside from white and black). Good thing I had the white one and also some yellow spray paint lying around. In just a few minutes, I had my new frame ready! :)


Now here's our updated silhouette art on the wall (and the new arrangement of the frames). So happy Skyler's now part of it! :)

Friday, August 15, 2014

DIY: Getting Creative with Chalk

Like every other parent, I love taking pictures of my kids. I love dressing them up in costumes or cute little outfits and teaching them how to pose (my daughter Miley has mastered the hands-on-hip, beauty queen stance at 4 years old).

We’ve had our family portraits done by a professional photographer about 4 times already (basically once a year). And one thing I can say is that these photoshoots do not come cheap these days. It really is an investment, especially if you choose to go with the more well-known studios around town. 

But really, there’s no reason not to have beautiful pictures even if you just take these by yourself at home. I love searching for inspiration online, and if I can recreate something with my kids, I’m all for it! One of those ideas I’ve been wanting to try is sidewalk chalk photos.

I love this whole concept since it’s so easy, inexpensive, and creates a big impact. All you need is chalk, an area where you can do your drawing, and a huge imagination.


To find out more on how I did this, please head on over to Cerelac & Gerber's #ParentingNerd blog, where I (along with other mommy bloggers) give lots of cool tips and ideas on Food, Fashion, and Arts & Crafts.

Monday, July 1, 2013

DIY Stencil Art (and other things you can do using a black marker!)

We're currently redecorating my sister's room, which used to be my room (together with hubby and the kids) back when we were still living with my mom. Anyway, I almost forgot about this little wall art I did 3 years ago which I believe is actually my very first DIY home project! This whole thing was done with black markers and I did this when I was pregnant with Miley so it holds a special place in my heart. Unfortunately, it's not my sister's style so she insisted on painting over it (despite my objections!). ;p


I remember back then when wall stickers were so expensive, which is how this project came about. I figured I can just draw this on the wall myself! What I did was search for a photo of a cherry blossom stencil online like the one below (sorry, I couldn't find the exact one I used back then). Then, I printed an enlarged version which I made sure fit the area on the wall perfectly. Don't worry if the print out is all pixelated or blurry after enlarging it. You just need it as a guide anyway. Then, I cut out all the black shapes, taped it to the wall, then traced it using pencil. Then, I just filled it in with black pentel pen after. :)

source

It took me a couple of markers and hours to finish it, but here's how it looked after:


I'm going to miss my cherry blossom wall art, but at least I can always recreate it since it's so easy to do. Here are other projects I found online using black markers. I love the first one since it's like what I did only it was done on the whole wall like wallpaper. Brilliant!

source
source
source
source
source

Don't you just love easy and cheap projects like these that make a big statement? :)

Tuesday, February 5, 2013

Cool DIY Duct Tape Projects

Before I made my own duct tape chevron table, I had no idea duct tape could be used for anything else other than packing and taping things together around the house. Or that it came in any other color other than gray.

Maybe it was my DIY inner goddess but I had the idea of using duct tape to do my chevron pattern before I discovered that it was indeed being used for countless other craft projects (yes, I can be a visionary like that ;p).

The night before I did my project, I just randomly searched for "diy duct tape table" online just to check if it had been done before and to see if I wasn't actually crazy for thinking about putting duct tape over a table (just like hubby said). And voila! Out popped all these amazing arts and crafts stuff that made use of yes, duct tape. I swear, it was a life changing moment for me haha! I mean who would think that you could use duct tape to make accessories or bags?! Amazeballs!

I guess it helps that duct tape now comes in all these cool colors and patterns. Although I don't think they have the printed ones here in the Philippines. If they did, I think I'd go crazy panic buying! ;p

Anyway, here are some of my favorite projects that I found all over the blogosphere. If this is your first time to be introduced to duct tape as being used for arts and crafts, then prepare to be inspired and amazed! You won't believe the things you can actually make with it. Click on the link below each photo for the full tutorials. Enjoy! =)

HOME DECOR

lamp shade
pillow covers
chevron chair
diamond wall decor

PHONE & IPAD CASES

iPhone Case
phone case
iPad covers

BAGS
beach tote bag
patterned clutch
color blocked clutch

ARTWORK

canvas artwork
tumbling block art
silhouette art

ACCESSORIES

rosette accessories
feather earrings

WRAPPERS

gift bags

KIDS

bracelets & wands
fun masks for kids

Here's also a tutorial on how to cut duct tape. Like I said in my previous post when I made my chevron table, using scissors to cut duct tape for projects like these will get you nowhere. The tape is just super sticky so it will end up sticking to the blade and to each other. I swear, it's not pretty. Anyway, without finding this tutorial, I would have probably given up on my first attempt with duct tape. ;p

source

Now don't you just want to run to the nearest store to buy a roll of duct tape? =)


Tuesday, December 18, 2012

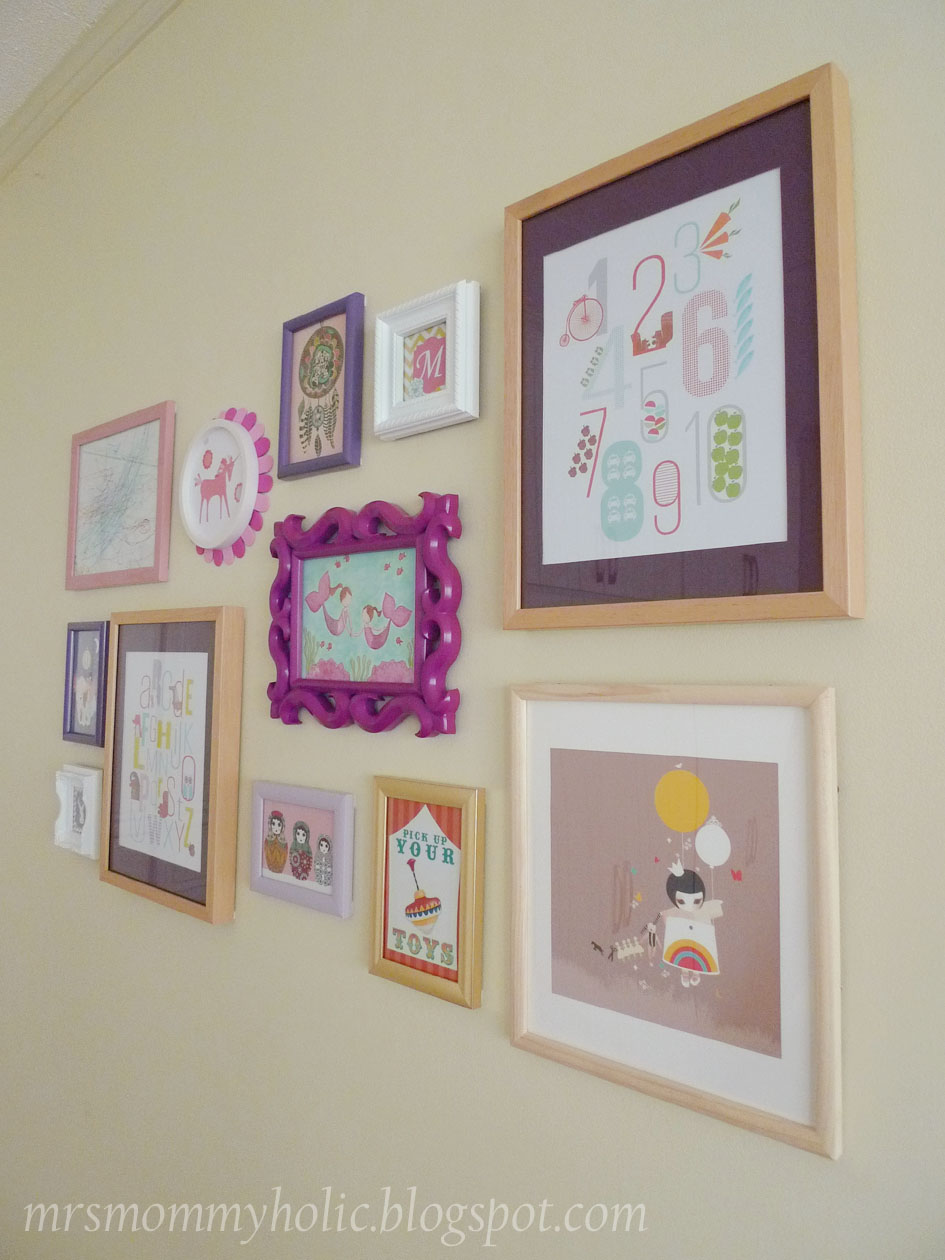
Reveal: New wall gallery for my little girl

This gallery has been a work in progress for a few months now and finally it's done! If you remember last month, I posted a sneak peak of the arrangement of the frames I was planning to do (I went with Option B!). But even before that, I was already figuring out what to put in the frames.


Btw, all artwork are from Etsy.com (some I had even bought almost 2 years ago) except this one which is Miley's 1st ever drawing! It definitely deserves a spot on the wall. =)


And here's the DIY flower frame I did (see the tutorial HERE).


Here are the other pictures which are a mix of the different things Miley loves. =)


Oh, and the best part? This whole wall gallery is DRILL FREE! I just used double-sided mounting tape to hang everything. Good job to me haha! =)

LinkWithin

Related Posts Plugin for WordPress, Blogger...