At first, I was just planning on using my son's cape from his Superman costume and just adding a hood to it. But then, I watched a tutorial on YouTube which seemed easier. And it barely even took me half an hour to make. Here are the materials you'll need:
For the fabric, I bought a yard for just P90. I think a jersey material works best since it doesn't fray when you cut it, so you don't have to hem the edges anymore. And I like the stretchiness since it falls really well on the body, plus it doesn't get wrinkled easily.
 |
| the measurement of my fabric |
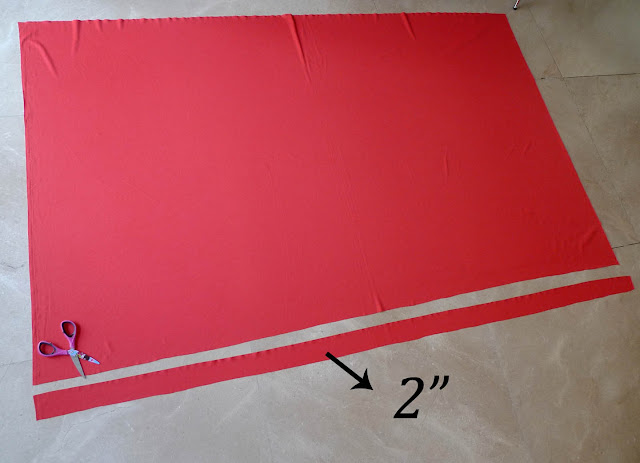
After you lay your fabric flat, cut a 2-inch strip from the bottom which you will use later on for the ribbon of the hood.
Then, cut a 10-inch wide piece of cloth which will be the hood part. Set aside the bigger piece of cloth for now.
The cloth for the hood measures 36" x 10". Fold this in half:
Close one end of the folded part as seen below. You can use fabric glue if you have some, but I just sewed it together using a quick running stitch.
Then, fold the open part upward about 2-inches. Use a pencil and ruler to measure 1" for the first mark, then 2" for the succeeding ones.
Cut small slits where you marked on the fabric. Set aside for now.
Now, get your bigger piece of fabric and fold this in half. This will be the cape part.
Fold the bottom part upwards about 2-inches and mark the same way as you did with the hood part. 1" first then 2" after. Cut small slits as well.
Now, get the hood that you made and turn inside out. Get the strip of cloth from the beginning of the project and loop it through the middle slits.
Get the cape part, lay it down flat and align with the middle of the hood. Then connect the two pieces together by looping the ribbon through the slits on the cape as well.
It will look like this after you've looped through the whole thing:
For her outfit, she already had all the pieces in her closet so all I really spent for was the P90 fabric. You can use any red, white, or even black dress for this. Or maybe even a white shirt and red skirt (or vice versa). The pegs I saw online made use of a white apron, but since I didn't have this, I just layered a white skirt over her dress. Then, I just used her black school shoes and white socks to complete the look.
And there you have it, a super easy Little Red Riding Hood costume! I also found a basket from when she was a flower girl and she insisted we really put cookies inside. ;p
And good thing we brought the cookies because someone got hungry after our photoshoot hehe!
Are you celebrating Book Week at school too? If not, this can be a great costume for Halloween as well. Now I'm thinking maybe her brother can be the big, bad wolf! ;p


No comments:
Post a Comment