Showing posts with label sunburst mirror. Show all posts

Monday, August 4, 2014

DIY: Sunburst Mirror Makeover

Remember this sunburst mirror I made out of wood shims? Well, I decided to give it to my sister who redecorated her room (actually, it was my old room when hubby and I still lived at my mom's house). She didn't like the natural wood finish since it didn't go with the new paint colors and furniture, so we decided to make it silver. :)

time for a makeover!

We just used a couple of coats of spray paint and the whole thing was done in about 15 minutes.

used masking tape to cover the mirror while painting

Here's the BEFORE and AFTER look. From my living room to it's new home in the bedroom.


If you noticed the reflection in the mirror, the opposite wall is painted with gray and white stripes which we also DIY'd. :p


Doesn't the silver look so much better with the purple background and black furniture? I think it's the perfect accent piece for the room. :)


Friday, April 5, 2013

DIY: Wood Shim Sunburst Mirror

I have been obsessed with sunburst mirrors for the longest time and have actually made some DIY versions here, here, and here. Now, I can add another one to my collection! :)


It all started when I came across this wooden sunburst mirror tutorial that I instantly fell in love with. It was made from paint sticks, which apparently you can get for free in the States. Anyway, I started searching for more DIY sunburst mirrors, which led me to discover so many other versions like this one made of wood shims. It was the first time I had heard of wood shims and I had no idea where to find them here in Manila. So when my in-laws went to the States, I added that to my list of bilins! ;p

each pack has 42 sticks and are 15" long
wood shims are also very lightweight and are tapered at the end

Anyway, you need a base for the sticks, so luckily there was this piece of wood at my mom's house which I used. If you notice, I made a sort of grid to act as my guide when I glued on my shims.


I also attached my picture hanger at the back before I started anything since it would be harder to nail it on when the sticks were in place.


Anyway, I lightly sanded the wood shims first just to get them all nice and smooth. After I was happy with the position of the sticks, I then started hot gluing the first layer of rays, with the thin end of the shims in the middle...


Then added the next layer in between the gaps...


Then finally my last layer, which I placed closer to the center so that they'd look shorter than the outer rays...


I then hot glued a 7" mirror in the center...


Then used Mighty Bond to attach a 7" embroidery hoop (which I got from Dreams in Glorietta 5) on top of the mirror...


I used 48 wood shims in all and the total size of the whole thing was 3ft! I was on the fence about painting it since I really love the natural wood effect so I left it alone for now. I took down my other DIY sunburst mirror made from poster board in our living room and hung this new baby in its place. Although it doesn't seem to pop as much with the orange wall behind it (or maybe it's just the lighting) but I'll give it some time until I move it to the bedroom in the future. Oh, and the whole thing wasn't as heavy as I expected since I hung it on an adhesive picture hook (which holds up to 4 lbs.) and it seems stable enough. Hopefully, it doesn't come crashing down anytime soon, fingers crossed!


I still have a pack and a half of shims left over, so I can definitely make another mirror. Maybe this time, I'll paint it gold or even a fun, bright color. :)

Wednesday, September 5, 2012

DIY Sunburst Mirror (made from poster board)

I really am addicted to sunburst mirror projects lately. The first 2 I did (here and here) were smaller and more suited for a kids room. This time, I wanted something I could use for our living room wall which had been staring blankly at me for the longest time already. I had been contemplating buying a painting but when I saw the prices, I figured I could just DIY a little something for now.

There are actually so many DIY activities you can do just by searching online. I have a number already saved in Pinterest but what caught my eye to this project was the use of plain old poster board to make the mirror. I wish I could take credit for this ingenious idea, but the whole thing came from this blog The Nester. It seemed easy enough (and cheap!) and by following her step by step instructions, I think I was able to duplicate it pretty well. ;p


You can just go to her page to see how she did it, but I'll also provide my own instructions since I modified some things a little bit. Plus, I want to show you guys just how easy it is to make!

Materials:
- poster board or cartolina - I ended up buying what's called bristol boards from National Bookstore at P21.50 per sheet. I bought about 10 sheets but ended up using just 5.
- round mirror - I used one with a 7" diameter
- embroidery hoop - (also 7") I bought this from Dreams in Glorietta 5 for P72
- glue gun
- scissors
ruler
- pencil
- Mighty Bond
- sawtooth picture hanger - P59.75 (pack of 5 small hangers with nails) from Handyman
- adhesive picture hook - P89.75 (pack of 2) from Handyman


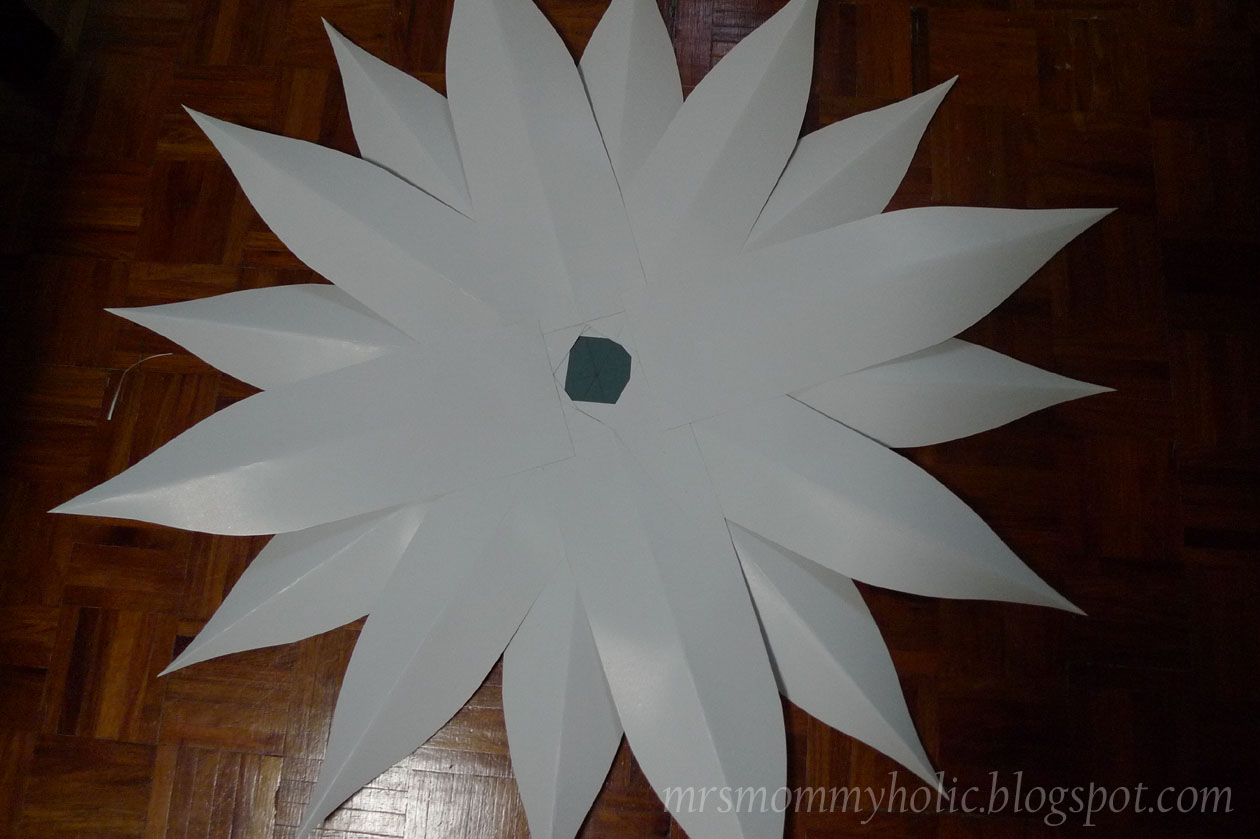
First, I made a template for the size of the ray I wanted. This became my guide for the rest of the rays. I believe each sheet fits 5 rays (according to the size I made). You have to fold the posterboard in half first before cutting the ray shape. This gives dimension to the rays and also ensures that the ray is equal on both sides. Take note that the bristol board is a little hard to fold since they're a bit thick. You have to do it carefully, otherwise the fold becomes all weird and crooked. But once you get the hang of it, it becomes really easy.


You'll need 24 rays for the entire mirror. I made the 8 rays nearest to the front a bit smaller to add depth to the entire thing.


Then, mark the back of the mirror dividing it equally into 8 sections. This will be your guide since you'll glue your rays in sets of 4.


Now the fun part! Then time to start hot gluing. You really have to work quickly though before the glue dries up. Side note, I really hate it when the hot glue oozes out of the gun when you're not using it! Be sure you have scratch paper on the side so you won't make a mess on your floor or table. I was able to glue everything in about 15 minutes.


This is how the back looks after all the rays were glued into place. I was afraid it wouldn't hold, but hot glue really works!


Remember the embroidery hoop? Well, I just found the mirror to be too plain, so I attached the hoop on top of it using Mighty Bond. I just think it adds more dimension to the whole thing. If you find a round mirror with a frame already, then that would be perfect.


Now for the hanging part. Since I won't be able to hammer the sawtooth hanger with nails on the back of the mirror, I used trusty old Mighty Bond once more. Again, I was skeptical at first if it would hold, but it did the trick!


I used the remaining adhesive picture hook from Handyman which I used in my previous project. Just mark where you want your mirror to go and stick the hook on the wall. That easy!


And here is the finished product on my living room wall! Now, my wall doesn't look boring anymore. In fact, it looks amazing! Everyone who comes to the house always compliments it and they can't believe it when I say what's it made out of.


I am so happy with this new project because not only is it easy to make (you just need half a day or even less if you don't have little kids running around ;p), it's also cheap! I believe I spent just about P500 total compared to thousands of pesos if I bought something from a store. Plus, it just looks so good! So again, thank you to The Nester for this wonderful tutorial.

I have another mirror lying around the house, so you can be sure I have another project lined up for that. Stay tuned! =)

Friday, August 3, 2012

DIY Sunburst Wallart (version 2)

Here's another version of the sunburst wallart I did using corrugated paper. This time though, I used different colors and a mirror in the center instead of a cork pad.


For detailed instructions on how I made the rays, just check out my post here. Anyway, here are the materials:
- corrugated paper (P69.50 per pack at National Bookstore)
- pencil, ruler, scissors (to make the rays)
- masking tape
- glue gun
- mirror

I found this small round mirror at Daiso / Japan Home Centre for just P66. The diameter at 3.5" was just the perfect size.


Instead of overlapping the rays like I did last time, I just laid them all flat and placed them side by side. I did have some trouble though since the size of the rays didn't form a perfect circle. That's why I adjusted the sizing of the white rays (notice how they're thinner than the rest).


Once I was happy with the arrangement of the colors, I then taped all the rays together at the back.


 Then, just glue gun the mirror to the center...


And there you have it, a super cute and inexpensive sunburst mirror. This is so light you can just use heavy duty double sided tape to stick it to your wall. I still have to figure out where to put this though, maybe in my son's room once I get around to fixing it up? =)


Tuesday, July 17, 2012

DIY Sunburst Wallart

Now you know what I've been up to these past few days and the answer to my preview question hereI just love sunburst mirrors / art. There are actually a lot of DIY projects online using all kinds of materials and now I've finally gotten around to doing my own version of it for Miley's room.


But first, let me give you a little background. It all started when I saw this mirror in one of the posh furniture stores in G4. The style of the rays really caught my eye but the price tag was something not to be desired.


I was then in National Bookstore where I saw these corrugated papers. Now doesn't the texture look like the rays from the expensive mirror? Hmmm... I could already feel an arts & crafts project coming along.


I was going to use a mirror but then I happened to see these round cork trivet pads at Handyman on sale. They came in a set of 3 and I decided to use the smallest one with a 5.5" diameter for this project.


I could already picture what I wanted to do in my head. I was going to create a sunburst piece of art without even using a glue gun. I mean what else would you use on a corkboard? Thumbtacks!


Anyway, here are the materials:
- corrugated paper from National Bookstore - P69.50 per pack
- round cork trivet pad from Handyman - P125 (50% off) for a set of 3
- thumbtacks - P20.75 (100 pcs)
- pencil / pentel pen
- ruler
- scissors
- bond paper
- thread
- adhesive picture hook from Handymay - P89.75 (pack of 2 hooks)

Before I cut up my corrugated paper, I wanted to do a sample first on bond paper just to check the sizing and layout. I ended up with 16 rays arranged this way - 8 inner rays, then 8 outer, longer rays in between.


This is the final measurement of each ray:


After I was happy with the size and arrangement of the rays, I was ready to cut up my corrugated paper. Just follow the sizing of the bond paper ray and then trace the template on the back of the corrugated paper (the smooth part). Each paper can fit 3 rays based on my sizing.


The corrugated paper comes in many colors but I chose to stick with the warm tones of yellow and orange, with a little bit of pink and white mixed in. These colors fit best in Miley's room and this way it would really look like a sun.


I then marked one side of the cork with lines dividing it equally into 8 sections. This will act as my guide when placing my rays.


I also marked the back of the rays as a guide, so that they'll all have the same height when I stick them in.


The hardest and longest part of this project for me was deciding how I wanted to arrange the colors of the rays. After a couple of mixing and matching, I was ready to stick them in!


Start with the 8 inner rays first. Just align each ray on the center of the line and then stick the tumbtack in. Super easy!


After finishing with the first layer, just stick the outer rays in between the inner rays.


The thumbtacks hold the rays firmly in place but if you're worried about them moving around, you can always put masking tape in between the rays to make sure they stay put. Now turn the whole thing over!


Now I didn't buy all those thumbtacks for nothing. I placed them around in a circle on the front just to add another layer of texture and so that it wouldn't look too plain.


Now to the hanging part. I bought adhesive picture hooks at Handyman. The sunburst art is super light so no need to worry about the hook falling off because of the weight.


I then looped a piece of thread between 2 thumbtacks. Like I said, the whole thing is so light so I'm pretty confident this will hold.


And here is the finished product hanging nicely on the wall. The diameter of the whole thing is roughly 20" and I just love it! Miley calls it "Mr. Sun". =)


Total cost of the whole thing? About P300! And it only took about an hour to do. Not bad for a fun and unique piece of wall art. What's great is you can be flexible with the materials. For example, you can use regular cartolina or poster board if you don't have corrugated paper. If you prefer using a mirror, you can also do so by using a glue gun to attach the rays. Anyway, I'm planning to do the mirror version of this so watch out for that soon. =)

LinkWithin

Related Posts Plugin for WordPress, Blogger...