
There are actually so many DIY activities you can do just by searching online. I have a number already saved in Pinterest but what caught my eye to this project was the use of plain old poster board to make the mirror. I wish I could take credit for this ingenious idea, but the whole thing came from this blog The Nester. It seemed easy enough (and cheap!) and by following her step by step instructions, I think I was able to duplicate it pretty well. ;p

You can just go to her page to see how she did it, but I'll also provide my own instructions since I modified some things a little bit. Plus, I want to show you guys just how easy it is to make!
Materials:
- poster board or cartolina - I ended up buying what's called bristol boards from National Bookstore at P21.50 per sheet. I bought about 10 sheets but ended up using just 5.
- round mirror - I used one with a 7" diameter
- embroidery hoop - (also 7") I bought this from Dreams in Glorietta 5 for P72
- glue gun
- scissors
- ruler
- pencil
- Mighty Bond
- sawtooth picture hanger - P59.75 (pack of 5 small hangers with nails) from Handyman
- adhesive picture hook - P89.75 (pack of 2) from Handyman

First, I made a template for the size of the ray I wanted. This became my guide for the rest of the rays. I believe each sheet fits 5 rays (according to the size I made). You have to fold the posterboard in half first before cutting the ray shape. This gives dimension to the rays and also ensures that the ray is equal on both sides. Take note that the bristol board is a little hard to fold since they're a bit thick. You have to do it carefully, otherwise the fold becomes all weird and crooked. But once you get the hang of it, it becomes really easy.

You'll need 24 rays for the entire mirror. I made the 8 rays nearest to the front a bit smaller to add depth to the entire thing.

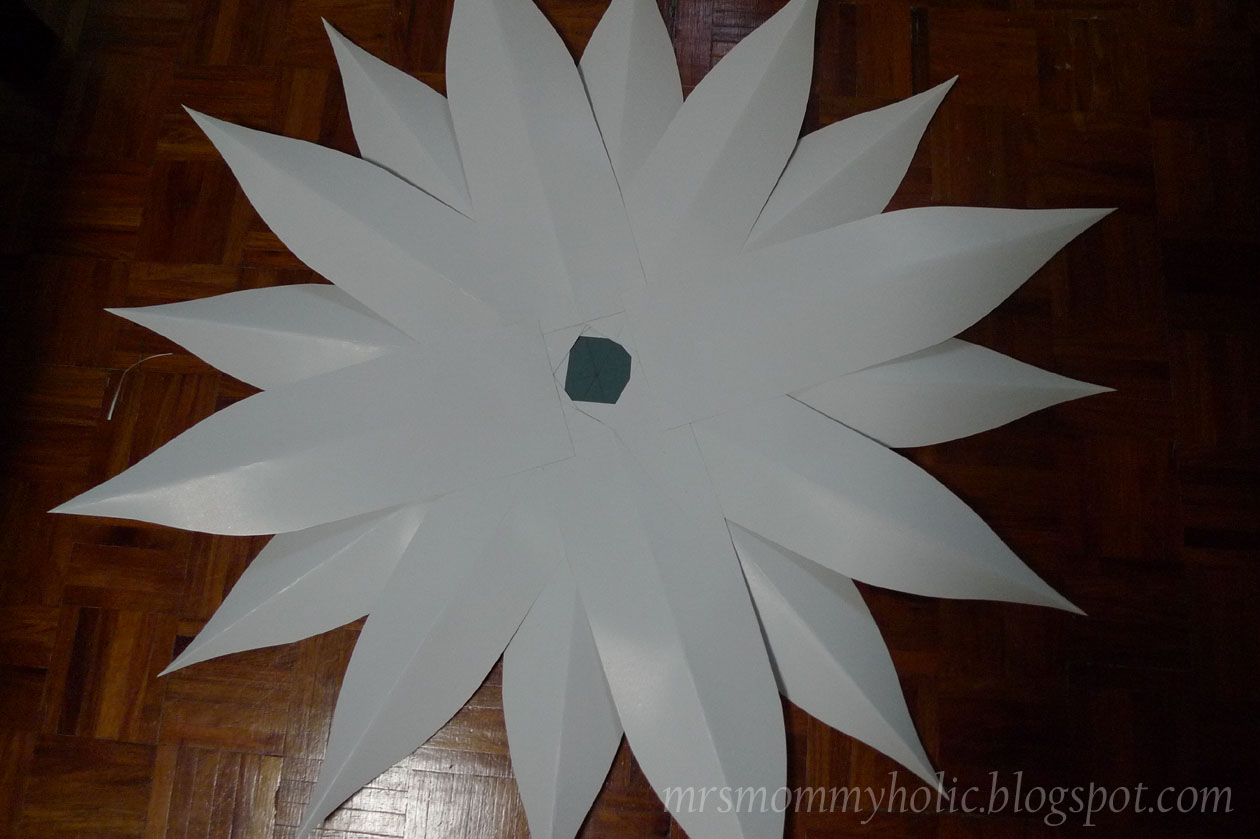
Then, mark the back of the mirror dividing it equally into 8 sections. This will be your guide since you'll glue your rays in sets of 4.

Now the fun part! Then time to start hot gluing. You really have to work quickly though before the glue dries up. Side note, I really hate it when the hot glue oozes out of the gun when you're not using it! Be sure you have scratch paper on the side so you won't make a mess on your floor or table. I was able to glue everything in about 15 minutes.

This is how the back looks after all the rays were glued into place. I was afraid it wouldn't hold, but hot glue really works!
Remember the embroidery hoop? Well, I just found the mirror to be too plain, so I attached the hoop on top of it using Mighty Bond. I just think it adds more dimension to the whole thing. If you find a round mirror with a frame already, then that would be perfect.

Now for the hanging part. Since I won't be able to hammer the sawtooth hanger with nails on the back of the mirror, I used trusty old Mighty Bond once more. Again, I was skeptical at first if it would hold, but it did the trick!

I used the remaining adhesive picture hook from Handyman which I used in my previous project. Just mark where you want your mirror to go and stick the hook on the wall. That easy!

And here is the finished product on my living room wall! Now, my wall doesn't look boring anymore. In fact, it looks amazing! Everyone who comes to the house always compliments it and they can't believe it when I say what's it made out of.


I am so happy with this new project because not only is it easy to make (you just need half a day or even less if you don't have little kids running around ;p), it's also cheap! I believe I spent just about P500 total compared to thousands of pesos if I bought something from a store. Plus, it just looks so good! So again, thank you to The Nester for this wonderful tutorial.
I have another mirror lying around the house, so you can be sure I have another project lined up for that. Stay tuned! =)
No comments:
Post a Comment